
We participated in a fun and informative straw bale construction workshop, led by a friendly and knowledgeable architect from Living Shelter Design. 17 volunteers showed up at 8:00 am Saturday and Sunday morning to learn, haul, and create both a building and a sense of community. The kind hosts had recently moved to Ellensburg, and they desired to build a straw bale barn for their horses on the windy open plains at their home.
Each day was filled with demonstrations, food and drink, lots of hands-on work, and good conversation with a pleasant mix of people, backgrounds, ages, and reasons for being there. The barn was prepared in advance to be ready for the straw bale walls, so we got to experience the construction process from the foundation up, building between the already placed timber posts and window / door frames.
At the lowest level, a 4″X4″ pressure treated wood border was created on top of the wide concrete foundation and the border was in-filled with small gravel to provide drainage if water were ever to get into the walls behind the eventual plaster coating. Nails were hammered partially into this lower border and left mostly exposed out of the wood so as to have small spikes that helped to grip the underside of the first row of bales. From there, the hard work of the straw bale jigsaw puzzle began.
Long straight walls without the interruptions of doors and windows would be fairly quick and easy to build, but this barn had numerous doors and window frames so there was extensive custom cutting, notching, and re-tying of bundles throughout the day. While the bundles were under the compressive force of the original bundle strings, we would use a large stout metal “needle” to thread string into and around the bales at measured locations. This allowed for removal of the original very tight strings to accommodate positioning of the new cuts. Some cuts would be along the entire side of a bale, some would be corner notches to fit up against large corner posts, and some would be thin slits cut into the depth of the bale and compressed from both sides of the slit for maximized rigidity.
After 3-4 rows up, we spiked through all of the rows from the top, using bamboo shafts to provide further assurance that the entire wall stayed together as one piece and to reduce the possibility of lateral movement. The top of the straw bale wall was 7 rows high, which was well above our heads and required the creation of steps with other bails to get the wall bails up into place.
A moisture meter was used to evaluate each bail and ensure that it had less than 15% moisture throughout its contents. Any moisture levels above that and the bale would not be used. Straw bale walls breathe well and rarely have moisture problems after they are properly constructed and sealed with thick plaster, but they should not start out wet since that can lead to rot and mildew from the beginning. Unfortunately, we found two bails that got by our initial tests and were found to be wet in one corner after already being buried 3 rows down in the walls. Everyone had to keep on the smiley face at that point and not get discouraged, disassemble the wall down to the level of the moist bales, re-cut the errant bale size, and re-assemble. Fortunately with good team work it did not take long and the result was a good quality wall.
Our main tools were a chainsaw to cut and shape bails, tape measure, utility knife for cutting string, hammer for pounding spikes or sometimes for removing straw with the claw end, and a sledge hammer for pounding walls into alignment. The biggest tool, though, was community effort, and by the end it seemed that everyone felt both comfortable and inspired by their abilities to construct straw bale walls.
The follow-on steps were left for another weekend: putting up waterproof membranes and materials at certain points, applying expanded metal lathe and then a grid of wire for the plaster to adhere, and especially the later finishing coats of thick plaster. To be continued…
Straw is considered to be a great wall building material for many reasons; its toughness and benefits surprise people. After the bales get encased in plaster, the walls are actually much more fire resistant than regular wood frame construction since the plaster serves as an excellent insulator and there are no air gaps inside to feed flames or create chimney effects. Rodents tend to not like strawbale walls walls since everything is too tightly packed for them to move around (whereas regular stud wall fiberglass fill is easy to rearrange and create a labyrinth inside). Insects tend to not like the strawbale either since the straw has little nutritional food value. The strawbales provide both thermal mass and insulation. And straw is actually a waste product, left over after the food portion of the wheat or oats is removed. In many cases straw is usually just burned on farmland to remove it, meaning that it’s potential utility is otherwise completely lost plus the burning is a large source of pollutants every year. The waste product can instead be made into a locally grown building material. There are 100+ year old straw bale buildings still standing and in good condition, which is much longer than many modern stick built homes will last!
Three of my photos here were used in the April / May 2013 edition of Home Power Magazine for the article “High-Performance Walls“.
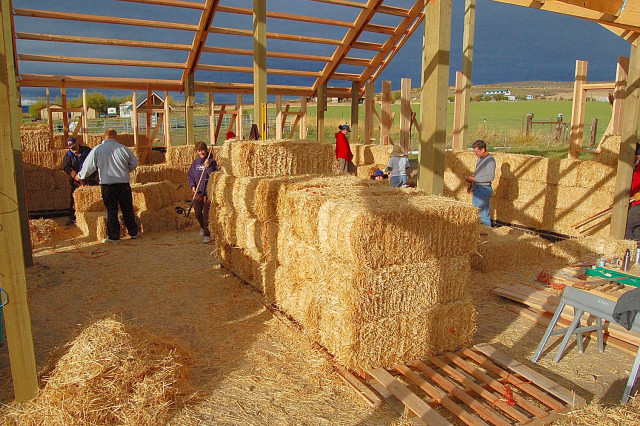
The timber frame and window/door framing can be seen from inside the barn’s skeleton, with bales stacked for easy access from the teams that worked on all sides at the same time
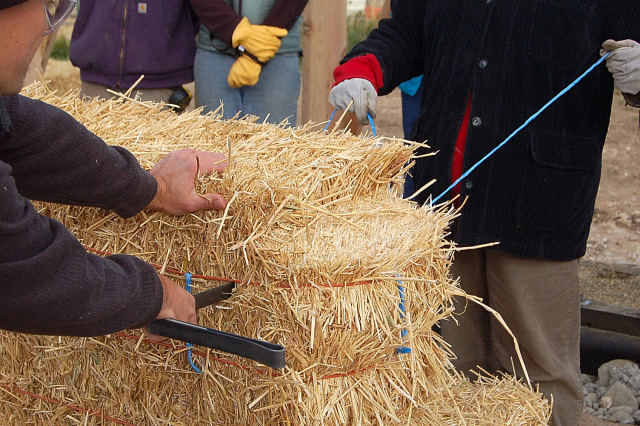
The large metal needle has a notch on the other end to pull the binding string back through; the new blue string will need to be added at this mid-point since the original orange string on the top layer here will need to be cut off to make way for the notch above
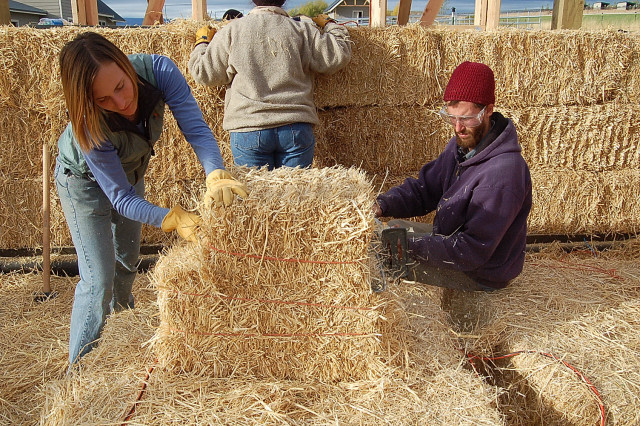
Cleaning loose straw by hand (left), while larger cuts are made with a chainsaw (right)

Hammering in bamboo rods to help keep all stacks together as a combined unit and reduce any lateral shifting

Wood top plate positioned above; straw stuffing still to come for filling the remaining gaps